Saturday, November 10, 2012

Not Sure What To Do With All Those Lego's?


I have 3 boys. 
 3 boys who absolutely LOVE Lego's. 
 And a family who loves to buy them for them. 
(Which is a blessing....as they are quite expensive.) 
 But as an organizer I racked my brain a million times as to how I could store them. 
Still having them accessible to play with at anytime and not losing my sanity with them being all over my floors. 

This is what I came up with:


I don't store a lot of toys in my kids rooms. It's hard enough maintaining them when they are central to one location...why would I make more work for myself? 
But I made an exception for Lego's. 
This little contraption was sized to my boys bunk beds. 
It sits on 4 casters so that it slides right under their bed. 
Out of sight. And out of this organizers mind. 
 Unfortunately I didn't take pictures of the building process but I will do my best to explain each step so that you can build your own.


I started with purchasing these green 10x10 Lego plates. They were the most expensive part of this project. I bought 12 of them at $6 a piece.  

 I laid each of the plates out so that they were touching each other on a sheet of 1/2 inch plywood. 3 rows of 4. I took a sharpie marker and traced the outside of the layout. (So that the measurement was exact to the actual plates I was using.)

I then took a circular saw to the outline. Once that's done, clean off the plywood and stain the color of your choice. (I only suggest staining the plywood because the Lego plates have rounded corners....so even as they touch, you will still be able to see the plywood.) Once this is finished and dry to the touch, take a caulking gun and a tube of Liquid Nails and glue each piece down to the plywood. Making sure to adhere the outsides of the plates well so that when your kids are taking pieces on and off of the plates...it doesn't pull it up. 
 Set aside to dry. 


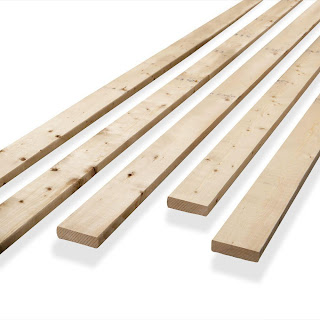
 I used 1X6 pine boards as the frame of this table. I cut two of them at 65 3/4 inches and laid them on the ground as the length. I then cut four 1X6's at 30 1/4 inches as the dividers.

This is the layout for that:


We used a brad nailer (with an air compressor) to hold the boards into place. 
We then took our piece of plywood with the Lego plates and double checked that it fit perfectly into the center before we put screws into the frame. 

Once we determined that it fit perfectly, we removed the plywood again and set aside. We pre-drilled holes and put two 1 1/2 inch threaded screw into each connecting pine board. (16 screws total.)

 The next step was creating the lip that would hold the plywood with the Lego plates.

This is the layout for that:


We used 1X2 pine boards to create this lip. Cutting two of them at 40 1/8 inch and two at 28 3/4 inch.
We brad nailed them so that there was a 2 inch reveal on the top and it allowed the plywood with the Lego plates to sit recessed.. So measure 2 inches from the top of the table and set the top of your 1X2 into place. Follow the same for all 4 pieces. Once set....go through with 1 inch threaded screws to add extra stability. 
(Being sure to pre-drill.) 

Once the plywood is added later, you will have about a 1 1/2 inch lip to keep the Lego's from falling onto the floor.

Now....onto creating the Lego storage. (My most favorite part!)

Flip table over. 

For this part you will need two 1X12 pine boards.
Cut length on both to 30 1/4 inches.
You will need to run these through a table saw to get the boards to be the 11 inch width that you need.
Once that is done, place into the storage spaces. Flush with the top of the table. 
(Remembering that it's upside down so technically it's the bottom of the table.)
Brad nail into place.
Remembering to go through and add 1 1/2 inch threaded screws for more stability.
(Remember to pre-drill.)

While it is still upside down...add your casters. 
We didn't want to be able to see them so we put them on the inside frame boards.(Remembering to pre-drill.)

Flip your table back over and it's time to stain your project.

Once it is dry to the touch...grab your caulking gun again. (The one with the liquid nails)
Run a bead of liquid nails on the inside of the 1X2 recessed lip. 
Add your plywood with Lego plates.

Fill storage bins and slide under bed.


This has proven to be one of our most favorite projects that we 'threw together.' 
The boys love it and the OCD mom loves it too. 
Keeps Lego's in their area and clean up is a BREEZE.
It's also big enough that 4 kids can easily be playing on it at the same time and there is plenty of room to create.


Project List:

Materials List:
12 - Lego Plates
brad nails
1 inch screws
1 1/2 inch screws
1 - can of wood stain
paint brush or rag (for stain)
Liquid nails
4 - casters

Lumber List:
1 sheet of 1/2 inch plywood
2 - 1 X 2 X 40 1/8
2-1 X 2 X 28 3/4

2 - 1 X 6 X 65 3/4
4 - 1 X 6 X 30 1/4

2 - 1 X 12 X 30 1/4

Tool List:
Cordless Drill
Drill Bits
Brad Nailer/Air Compressor (not necessary but makes building much easier)
Table Saw
Caulking Gun

Tuesday, November 1, 2011

(3 of 3) And we're ready to go.... ... ...

Okay, the closet is empty, the walls are finished and you're rearing to go. In my closets, I typically just use 1x12x8 pine boards for my shelving and cubes. The grade of wood is up to you. I go with a basic pine board that looks nice but isn't extra fancy. (It IS a closet after all.) The 1x12x8 typically runs me about $10 a board. (Just to give you an idea of how much your project would cost.)

Start by choosing your cube size and cutting your boards to length. Make sure to give yourself a clearance if you're building it first and installing second. Otherwise it wont fit in your closet after it's built. We generally allow 3 inches from the top of the ceiling.

After they are all cut, lay it out on a flat surface and put it together as it's laying on the floor. (Easier than building it standing.)


It helps to have a SPEED SQUARE to make sure the shelves are not going in crooked.


If available, use a BRAD NAILER to get it all together. Then go back through and pre-drill and add 4 screws to each shelf. (For extra support.)Once that's done, stand it up and make sure it slides easily into place.


It's now time to stain. (Or paint) It's best to stain or paint it before you anchor it to the walls. When choosing your finish remember that there will most likely be bins or baskets on your shelves. If you choose to paint your shelves, it is wise to go with an oil based primer first on them, then your paint of choice. And while it's pretty stinky, an oil based paint (or an oil based stain) will be the most durable.


Once it has the finish you like, you're almost done! After it's fully dried....anchor it to the walls with either L brackets or just screws. (Depending on the stud situation in your walls.)

Now it's time to hang your clothes bars. Depending on the clothes bar that you choose, you just want to make sure that the bracket that catches your bar is well anchored into a stud. if your bracket doesn't happen to fall on a stud in your wall, run a 1x4 the depth of the closet finding 2 studs in the board and attach your bracket to that.


You have now created a custom closet to fit YOUR needs....and for 1/4 of the price.


Wednesday, June 29, 2011

(2 of 3) Ready to do something about that unusable space?

Then we’re going to rip that shelf and single bar out and get started designing you a new closet from scratch….and at about a ¼ of the price a contractor would charge you. (And even ¼ of the price of places that sell closet organizers.) If you have the basic tools and can get your hands on and a miter saw, (or at worst case scenario, a good circular saw) then you’re in business.

First we’re going to sit down with a piece of paper and a pencil (Grab a ruler if you want to feel extra fancy.) and start to design your lay out. Think of different things that you would like to store in the closet that might otherwise be crammed in a drawer. (Swim suits, belts, hats, pants, long johns, your terrible towels.)

(Figure out an affordable way to get your hands on bins or baskets that match. A big reason I love IKEA)

Now start drawing....

I’m currently working on my master bedroom closet, and this is what my general design looks like so far:


I decided that we would have 6 cubes that run down the center with 3 clothes bars. Because we have a large mudroom downstairs, I have decided that what works best for OUR family is to have all of the shoes downstairs near the door. (It's just so much easier) so I decided that shoe shelves weren't necessary in our closet. We also have a lot of pants so I decided that instead of a fourth clothes bar that I would build more cubes, to the left of the center cubes, to house sweaters and pants.

I also figured that if we were to ever sell the house, that the extra cubes could be used for shoe storage if someone preferred them upstairs.)

(And don’t assume that you can’t do this if you have an oddly shaped closet. You just have to get extra creative.)

Now to start removing your existing closet….

Depending on what you have in there, find a place to house whatever you currently have in your closet. And get it completely empty.


**Removing existing rack:

(If you have a wire rack) Careful removing your wire rack system as it is installed with anchors and will destroy your walls if you’re not careful. Most other types of shelving or bars are most likely installed with just screws or nails. Just be sure to do it gently as to not destroy your walls.)

Fill holes with a dry wall compound. Wait for it to dry. It will shrink so a second coat is almost always a must. After second coat use a block sander and sand it until smooth. (or if you have textured walls, sand accordingly.)**


*Prime any spot that has new drywall compound.*

*Paint closet the color of your choice. (Most of the time I suggest a neutral paint color just because it isn’t often that you are painting and repainting your closet. I also ALWAYS suggest a semi-gloss in the closet as well. Much more durable and easier to clean.)*

And now you have your blank slate.


TO BE CONTINUED......

Wednesday, June 22, 2011

(1 of 3) Biggest space waster in a home is.......(DRUM ROLL PLEASE)

THE CLOSET!

Something SO frustrating to me!

I don't get it. Contractors build these beautiful homes...and throw in a wire rack . A WIRE RACK! Hanging it at about 2 feet down from the top of the 8 foot wall!! Unless you or your significant other are 12 feet tall and need the 6 foot space to hang their GINORMOUS clothes from...you're killing off about 4 feet of usable closet space!

People often get overwhelmed by the dead space and start filling it with mismatched bins and baskets to house their belts or their ties…or shoes. Or folded pants and shirts on the top rack that are hard to reach and almost always end up bring all of them down if you try to grab for one. looking like this:


And often, a standard closet just doesn’t have enough hanging space. (especially if shared by a husband and a wife.)

When I’m doing a closet, my thoughts are usually “what needs to be in the closet that would free up space in the actual bedroom? (Especially in a kids bedroom. )
FOR EXAMPLE….In my kids room, I hang every shirt. (T-shirts, dress shirts, long sleeved t-shirts and sweatshirts.) Everything else has it’s place in a dresser drawer. (pants, shorts, jammies, socks and undies.) I originally started doing this because I was finding that a lot of shirts weren’t getting worn because there were just piles of them in their drawers and as long as the laundry was kept…it seemed that the only shirts being worn were the ones on the top. I tried rotating them…but even that didn’t work. So I decided to start hanging them. This way I could see all of my options…and make sure to get use out of every shirt. Then i realized how much space I was saving in the bedroom because I was able to eliminate a dresser.

... .. . ..And that’s when it clicked.

Then I found myself REALLY enjoying making up closet designs that would work best for us. How I could properly utilize the closet space in each room. It was a challenge for me. (And I was floored at how affordable it was as well. )

But don’t worry….i’m gonna give you some ideas that will help deal with that unusable space.

......TO BE CONTINUED.

Tuesday, June 21, 2011

grey is the new neutral....


SPREAD THE WORD!
You don't have to paint your entire house a different shade of tan anymore.
Grey is just as neutral as any of those.

And, unlike greens and yellows....it's hard to mess up a grey. (It especially looks rich and clean if you pair it with white trim.)

It matches almost every other color so that choosing accents shouldn't be tricky.

Monday, June 20, 2011

never underestimate .. .. . the power of hangers that match.


Are you one of those people that has an array of colored hangers? Or, lest I say, metal hangers direct from the laundromat? Or even those plastic ones that come directly from the store in which your shirt was purchased? Complete with the size labeled on the top? If so, then this little excerpt is for you....

People pay me to organize their closets. And the experience I have in the "hanger department" is almost always the same. I suggest that they get hangers that match, and they try and argue with me that it's a waste of money when they have plenty of hangers already. This to me is one of those things that takes an organized closet up about 5 notches.

I generally take around 10 hangers that match and hang the clients clothes on them. and on the opposite side I'll take their mismatched hangers and do the same. It's within seconds that the decision is made to move forward in the matching hanger purchase. Why? Because it looks better. Plain and simple.

There's something to be said about opening your closet door and your eye not be broken up by the chaos of different shapes and sizes...or colors and textures.

Something as simple and inexpensive as a hanger.... ... . .....WHO KNEW?


** You can go to Walmart and get matching plastic hangers, color of your choice, for around 10/$1. (And if you wait until they have their "college line" out you'll have more color options at a cheaper price. You can even keep an ear out for clothing stores that are going out of business. They will most likely start selling those things off...and your chances of getting a nicer wooden hanger or thick metal hanger just went up. (Depending on your style) **